
AI Local Edit · change just the part you circle
Circle roughly, say one sentence, and the AI changes only that part · or circle several at once · on a new layer you can undo anytime
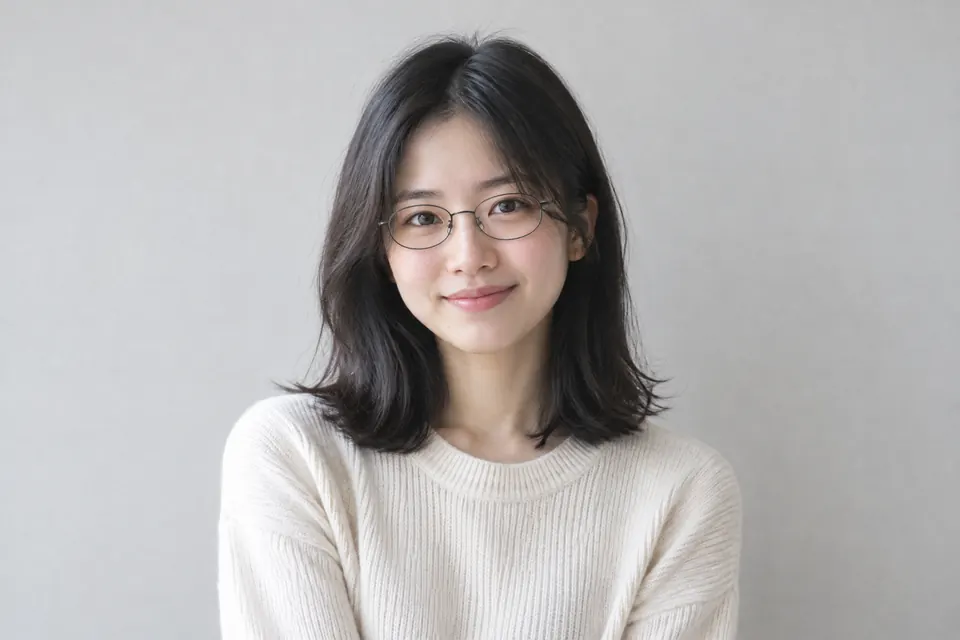
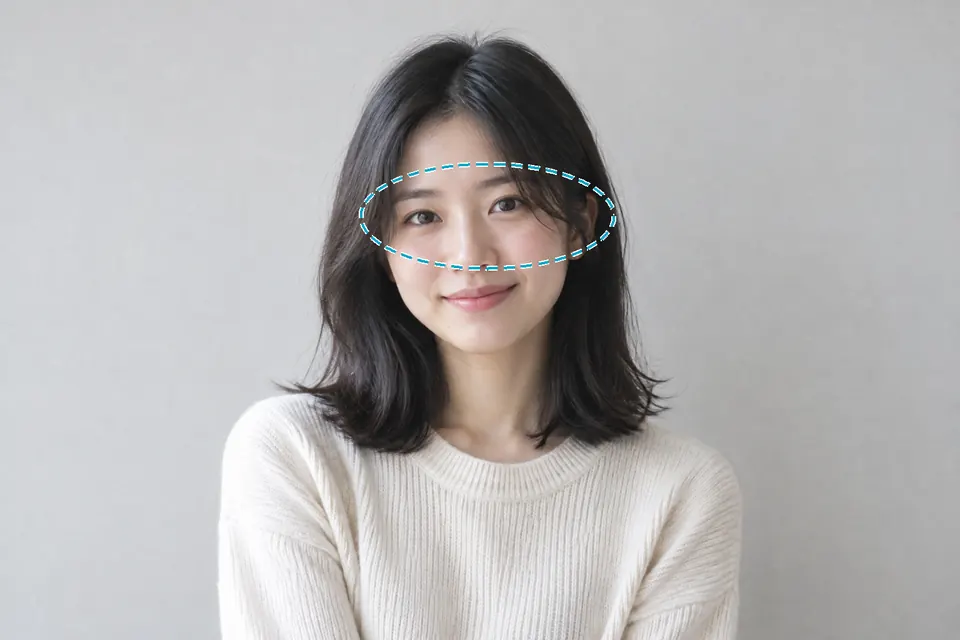 Original Result
 Example: the band across both eyes was circled with “put on a pair of glasses” — only a thin-rimmed pair was added; the eyes and face stayed put.
No image handy? Try a sample:
Samples take the same path as your own pictures: opening uploads nothing; only when you circle and say what to change is that area sent to the AI
Sometimes the whole picture is fine except one spot: a stranger in the shot, a mug you'd like in another colour, glasses you'd like to try on a portrait. That's what this page is for — circle that spot roughly with the marquee or lasso (no precise outlining), “✨ Change this to…” appears on the canvas, and you write one sentence. The AI takes your circle as the starting point and decides for itself how far the change needs to reach: circle one eye and ask for glasses, and it will usually fit a pair over both eyes, explaining in its reply why it went beyond your circle.
If you really want it to stay strictly inside the selection, just say “only inside the selection”. The result is a new layer with a mask and the original layer stays untouched: “Another one” gives a new candidate, hold to compare with the original, adjust only the mask if it shows too much or too little — no re-generation — and Ctrl+Z undoes it in one step. This step sends the area you circled to the cloud — no sign-in, with a free daily allowance; the generative model now and then leaves a trace behind, and another candidate usually fixes it. For removing small things on plain or simple backgrounds, the local “Remove Objects” tool is free, unlimited and uploads nothing while processing.
Several spots at once
Box each spot, write one sentence for each, and click Generate once; keep or remove each spot on the result card without regenerating.
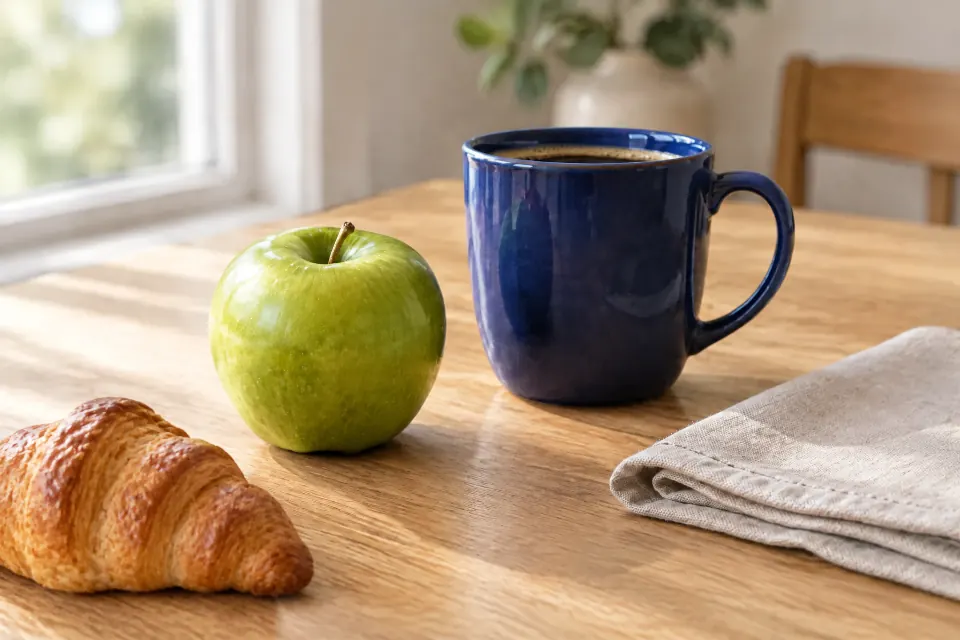
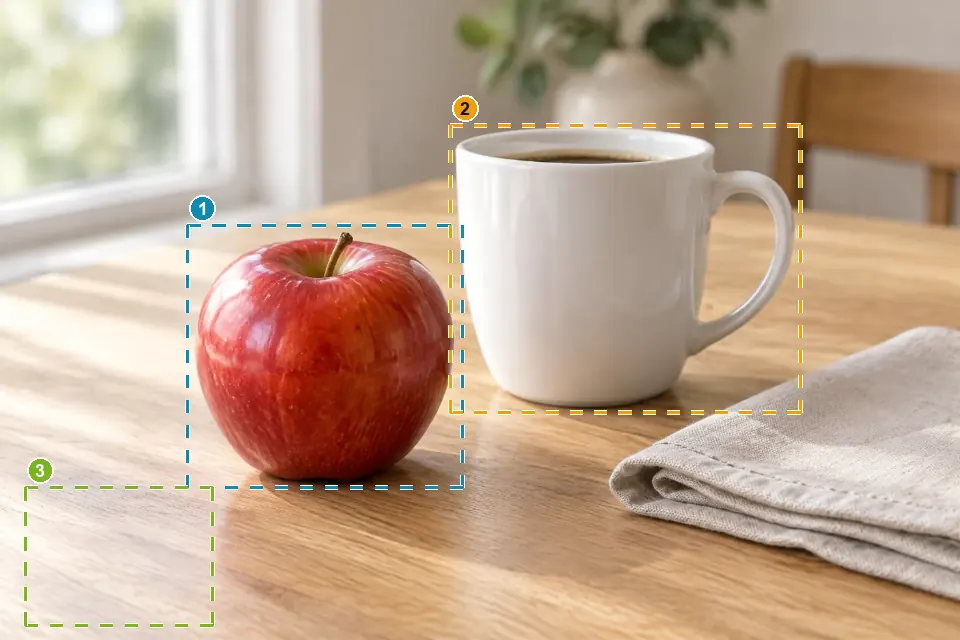 Original Result
 Example: one sentence for each of three spots (green apple · dark-blue mug · add a croissant), generated in one go. This example was really generated with TutuEdit, with no retouching afterwards.
Key features
A rough circle is enough
Rectangle, ellipse or lasso — or your finger on a phone; no need to trace the edges precisely.
The AI decides how far to reach
Glasses need both eyes, a shadow needs to reach the table — it starts from your circle, reaches out when it has to, and tells you how far.
A new layer + mask
The original stays untouched; flip between candidates, hold to compare; if it shows too much, adjust only the mask — no re-generation.
Phone and desktop
Open the page and go — nothing to install, no sign-in, a free daily allowance.
Several spots at once
Box each spot, write one sentence for each, and click Generate once; keep or remove each spot on the result card without regenerating.
How to use
- 1 Open a pictureDrag it in or pick it — or try one of the samples below first.
- 2 Circle what to changeYou land with the lasso selected; roughly circle that part.
- 3 Say one sentenceWrite what it should become in “✨ Change this to…”, or tap a quick word like “Remove it” or “Fill background”.
- 4 Pick one, keep goingHappy? Tap “Done”. Not quite? “Another one” or undo — and export PNG / PSD when done.
FAQ
- Do I have to trace the edges precisely?
- No, a rough circle is enough. The AI takes your circle as the starting point and decides how far the change needs to reach — circle one eye and ask for glasses, and it will usually fit a pair over both eyes. If you want it strictly inside the selection, say “only inside the selection”.
- Does it send my whole picture?
- This step sends the area you circled (with a little context around it) to the cloud to generate the new content for that area — no sign-in, with a free daily allowance. Just opening the picture and drawing the selection sends nothing to the AI (when you are signed in, your work is still saved to your own cloud projects as usual). If you'd rather not upload, small distractions on plain or simple backgrounds can be removed with the local “Remove Objects” tool.
- Can I get back to the original?
- Yes. The result is a new layer with a mask and the original layer isn't touched: “Another one” gives a new candidate, hold to compare with the original, adjust only the mask if the visible area is off, Ctrl+Z undoes it in one step, and deleting that layer brings back the original.
- How is this different from Photoshop's Generative Fill?
- It does the same kind of thing: circle an area, say a sentence, and new content is generated there. The difference is how you use it: here you open a web page and go — no subscription, no sign-in, a free daily allowance; the result is likewise an editable new layer, and PSD imports and exports. Whether and how far to reach beyond your circle is decided by the AI from what you ask; say “only inside the selection” to keep it inside.
- Why isn't it always clean?
- A generative model gives a slightly different result each time and now and then leaves a trace or doesn't go far enough. “Another one” for a new candidate usually fixes it; circling a bit wider and being more specific (“remove the person in the red jacket and fill in the cobblestones”) also helps.
- How do I circle on a phone?
- Open the picture from this page and the lasso is already selected — circle the part with your finger; two fingers still zoom and pan. Once you've circled, “✨ Change this to…” appears on the canvas; tap it to type.
- Can I change several parts of an image at once?
- Yes. Box each spot with the Note tool (I) or the marquee, write what each should become, then click “✨ Generate N areas” below the canvas. They're generated together as one new layer, and each spot only reveals the area around itself; on the result card you can hide or show any single spot, or redo just one. Boxes don't need to be exact: something added that's a bit bigger than the box won't be cut off.
- If the spots are far apart, is the whole image sent?
- The block that contains those spots is sent, which can be close to the whole image when they're far apart. If they're so far apart that the block would have to be shrunk, it's split into several generations to keep every spot sharp. Opening the image and drawing boxes don't send anything to the AI by themselves.
- What if I only want to redo one spot?
- Edit that spot's text (it goes back to “to do”) and click Generate again; or click “Edit one” on the result card and pick it — change the text or just press Enter to redo only that spot. You can also simply hide the spot you don't like on the result card and keep the rest.
Try AI Local Edit · change just the part you circle now
Opening the picture and drawing the selection stay on your device; only when you say what to change is that area sent to the cloud — no sign-in, a free daily allowance.