
Mark up a screenshot: circle, point, blur, number the steps
Paste a screenshot → mark it up → copy it straight back into the chat. Nothing to install, no sign-in.
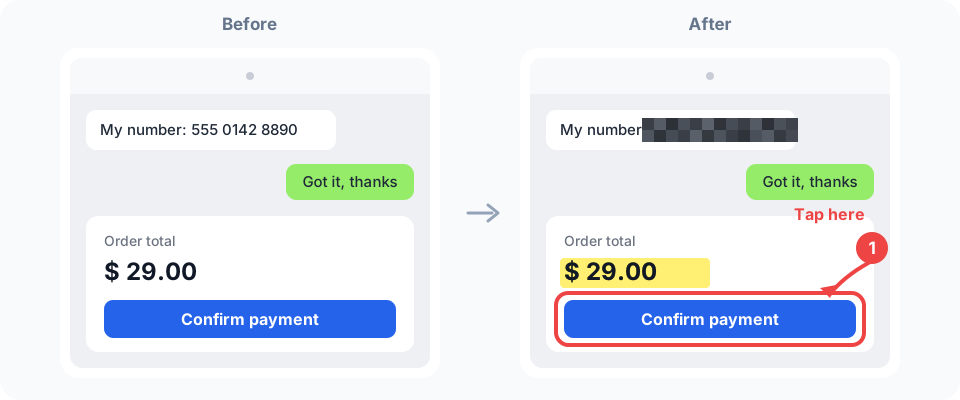
Screenshot markup is built for one job — showing someone else what you mean: blur the phone number in a chat screenshot, number the steps 1, 2, 3 in a tutorial, circle the bug for a colleague, point out what matters on a product shot. Paste it in, mark it up, copy it with one click and drop it straight back into the chat or the doc.
It runs on the same engine as the full editor: every arrow, box and label is a layer, so when you want more, press «Pro Mode» and carry on with layers, masks and filters on the same file — no reopening. Everything happens in your browser; the screenshot isn't uploaded while you're signed out.
What people use it for
-
Blur a chat screenshot
Box out the phone number, address or order ID before you forward it.
-
Number tutorial steps
Tap in order to place 1, 2, 3 and add arrows to show what to click first.
-
Circle a bug for a colleague
A red box around the problem and a line saying what's wrong.
-
Call out a product's selling points
Highlight the selling points and mark the price so the group gets it at a glance.
Key features
Arrows / boxes / circles
One drag and it's drawn — circle what matters, point at where to look.
Text / highlighter
Tap to type; run the highlighter over the line that matters.
Blur out
One box hides a phone number, an address or an amount, so you can share the screenshot safely.
Step numbers 1, 2, 3
Each tap drops a bold number with a white outline — readable on any background — counting up 1, 2, 3 by itself. Just right for tutorial steps.
Crop
Keep only the part you want people to see.
One-click copy / export
Copy to the clipboard and paste it back into the chat or doc, or export PNG / JPG.
How to use
- 1 Bring in the screenshotPaste with Ctrl+V or drag it in; on a phone, tap «Pick a screenshot from photos».
- 2 Mark it upArrows, boxes, text, blur, step numbers, highlighter — tap the toolbar and go.
- 3 AdjustSelect anything to change its colour or thickness; Ctrl+Z undoes at any time.
- 4 Copy it backOne click copies it to the clipboard, or export an image.
FAQ
- How is screenshot markup different from the full editor?
- The markup screen keeps only the everyday tools, so you can use it straight away; when you need layers, masks or filters, press «Pro Mode» and keep working on the same file.
- Does it work on a phone?
- Yes. Toolbar buttons carry a text label, the seven most-used ones sit in the first row, and the rest are under «More».
- Do I need to sign up or pay?
- No. It's free with no sign-in, and marking up, copying and exporting are unlimited.
- Is my screenshot uploaded?
- Not while you're signed out. The markup happens entirely in your browser and the screenshot stays on your device; once you sign in, your work is saved automatically to your own cloud projects so you can pick it up on another device.
- How do I get a screenshot in on my phone?
- On the start screen tap «Pick a screenshot from photos» and choose the one you just took; or copy the image in another app, come back and tap «Paste Screenshot».
- What if I want editable layers, or a whiteboard like Excalidraw?
- It's layered already: every arrow and label is its own layer, and saving a PSD keeps them editable. To sketch a diagram from scratch, pick «Blank Canvas» and start drawing; a hand-drawn, collaborative whiteboard like Excalidraw is a different kind of tool — this one is about screenshots and images.
Try Mark up a screenshot: circle, point, blur, number the steps now
No install · no sign-up · local stays local · free AI credits every day